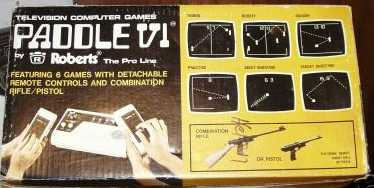
One gun that does it all, the "3in1gun"
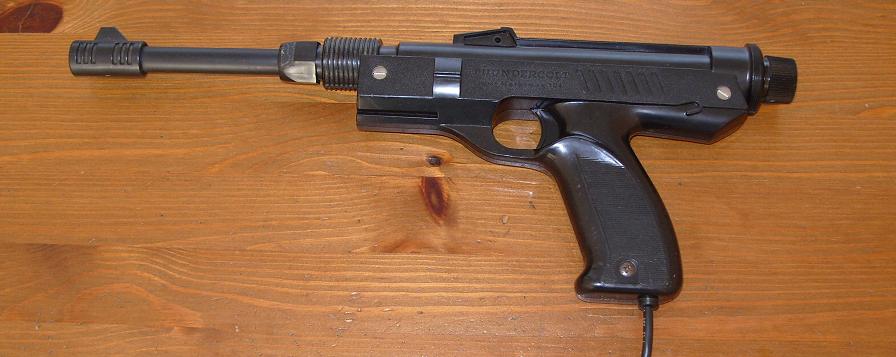
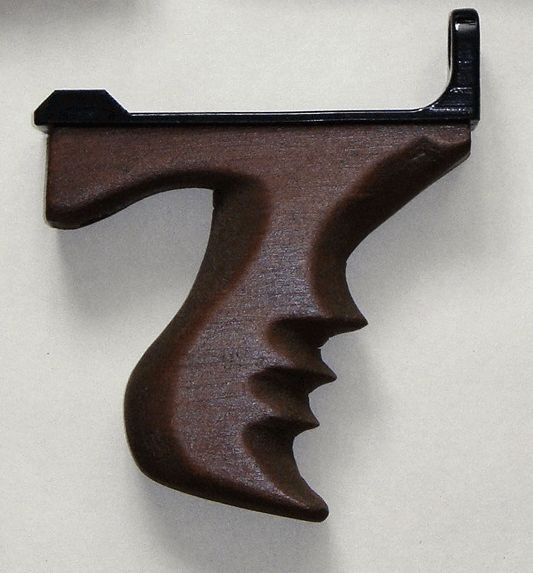
The chance that you own all original lightguns is very small, so in order to play all these games on your VIC20 or C64 there is no other option then to modify a lightgun. Not your functional one, but a gun that wasn't used otherwise. For instance from another platform, the SEGA or NES perhaps. I had an unused gun that looked a lot like the Stack light rifle, but I'm sure that it wasn't because on the side there was written "Thundercolt". It also looks like the gun Audio Sonic, Hanimex, Roberts uses. Anyway the text "Thundercolt" can't be clearly seen on the images, so I'm not sure to which game system my gun belongs to. Also this model could hold a ammo clip as seen in another variation of this gun. So this gun design has been recycled quite a lot. Anyway, I bought this gun on a yard-sale/flee-market many years ago, it had no box or anything else. It was just the gun. I bought it with the intention to make it work on my C64, but it ended up in box and came out almost 10 years later. To be modified into the 3-in-1-gun. My intention was to create a circuit that makes it possible to build a gun that can be made to act as each of the 3 guns (Stack light rifle, Magnum light phaser, Gun stick). So that it would be possible to play all the games with only one type of gun. Wow! What a great idea... and only 30 years too late.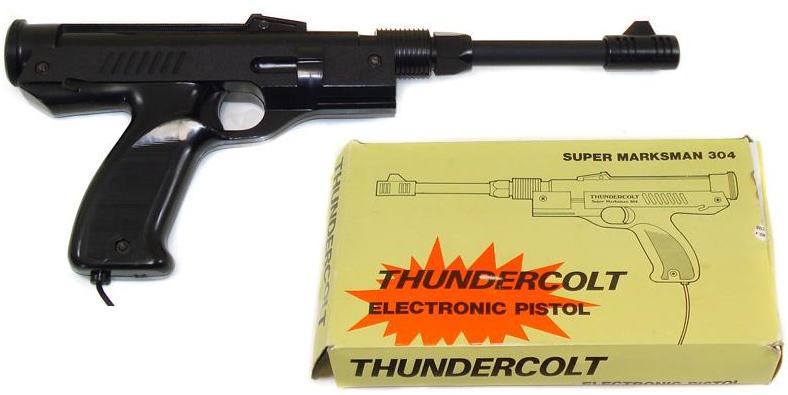

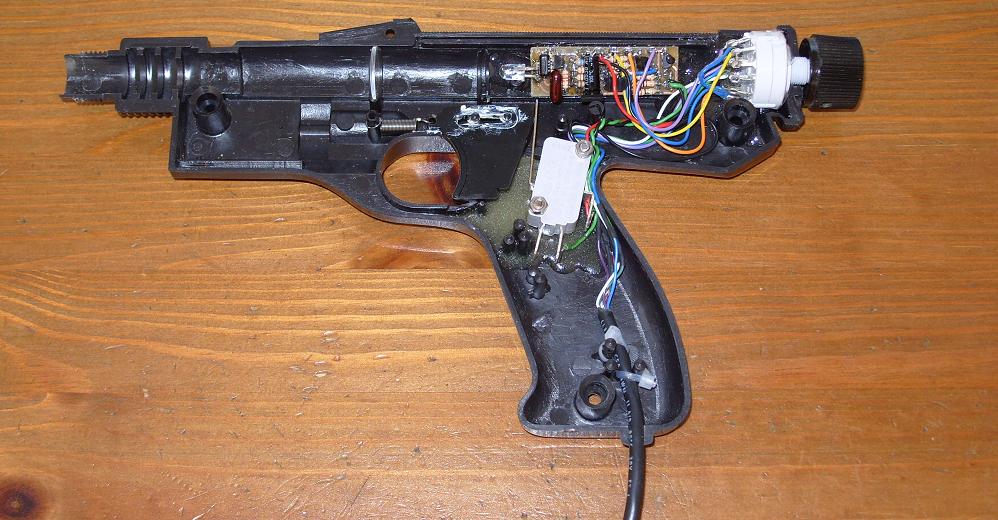
In order to keep it simple I ended up with a rotary switch and a circuit board consisting of multiple transistors. You could say "why didn't he use more modern components", well good question. But modern components have other problems, first of all, if somebody else needs to build this device, they must be able to obtain the components. Well transistors and resistors are easy obtainable and require no programming. A CPLD perhaps (which, in order to keep the total design simple, must be a 5V version. Which is not a recommended/preferred design requirement anymore. A microcontroller perhaps, well that requires some very good programming in order to compensate for the timing problems that the microcontroller adds to the lightpen/gun signal. But still, it is a difficult component for lot's of people who only want a proper lightgun and have no real electronics background and/or available programming tools. So in short, the good old transistors are the only realistic choice for keeping a simple device as simple as possible. And to be honest, transistors work great, they are small, require no special power supply and if the mentioned type is not available in your local store there are plenty of substitutes for this application. So this is what I came up with, a basic light detection circuit based on the Trojan Phaser together with some simple inverter circuits and a 4 pole 3 way rotary switch to connect the signals to the proper pins.
The end result of the PCB is quite satisfying as it is a very small PCB and I doubt if it would become much smaller if I used more modern components. The rotary switch fitted perfectly in the back of the Thundercolt I've bought on a flea market years ago. And the way the switch's button looks on the Thundercolt it seemed okay to convert this gun into a "3in1gun". There was nothing really lost in this conversion as the Thundercolt contained no electronics, cable, lens and the trigger switch was completely broken, so actually it was screaming to be upgraded. Some games require that the lightgun is disconnected from port 1 as there signals screw up the keyboard functionality. Well in that situation you can simply switch to a different gun mode and you'll be fine.
Tommygun modification
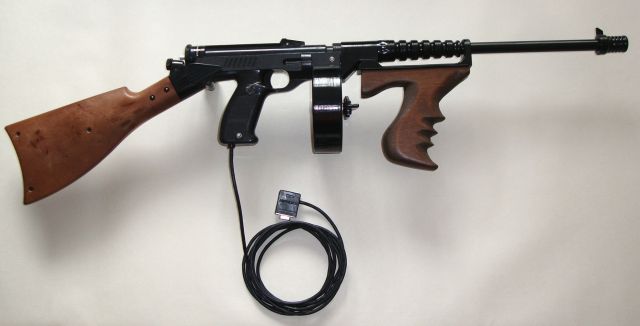
As shown in the photos at the top of this page, the lightgun that I used is of a very versatile design. Used by many kinds of early game consoles. The beauty of this gun design was that it allowed things to be changed or added. Therefore it was relatively easy to make it look different. For example, a longer or shorter barrel, a stock, magazine and even versions with a scope (not shown in the pictures here) exist. Wouldn't it be nice if this lightgun could also be converted in the most iconic submachinegun ever. And I mean "iconic", not the most used. I mean the Tommygun... the version with the drum magazine. It was used (at least in the movies) by the gangsters of the 20's and the police.3D printed parts
The only thing I had for my 3-in-1-gun was a pistol, a short barrel and a stock I that was given to me by a kind fellow who had 1 spare stock for his Stack light rifle. Since he had no real use for it and noticed I was missing one, he gave it to me. That was a very welcome gift that instantly transformed the lightgun into something much more interesting to look at. In order to convert my lightgun into something that resembled a Tommygun, it required me to add a longer barrel, a drum magazine and an extra handle.The barrel was made from a piece of grey PVC pipe, cut to length and painted black.
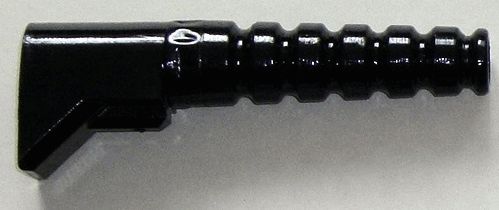
The tip of the barrel required something that looked like the real tip, so I printed that.

The barrel was attached to the lightgun using a very tight fit around the lightguns tip, no screws no pressurepoints, as I did not want to break anything of the original lightgun.
Considering the start of the barrel was pretty long and I was scared something was to go wrong during printing, I decided to print these parts in 2 steps and then glue them together. Unfortunately this caused a small deformation of the plastic as I touched it at a moment when I should because not all the acetone had left the part and therefore was still soft, but this is hardly noticable, though it does show on the photo below very well.
The grip handle mounted on the barrel was made from MDF, simply because drawing it in 3D was too much work, printing would take too long and I had no guarantees it would look like I would want it to look. Using some MDF and some simple tools I was able to quickly get the shape I needed AND using MDF and some proper paint (stain or varnish, depending on the look you want) it looks much more natural then plastic. This way the handle stands out much more. The handle mounts to a piece of 3D printed plastic that uses the barrel and the base of the barrel for fixing points. One single screw connects the base of the barrel to the handle, the screw never comes in contact with the lightgun itself. It does not apply any pressure to the original parts of the gun. The handle holds the barrel on two different points and is basically self supporting. It prevents the barrel from wiggling and stress on the original parts of the lightguns. Because it is no problem if a 3D printed part breaks, but I do when my lightgun breaks as I have only one of it.
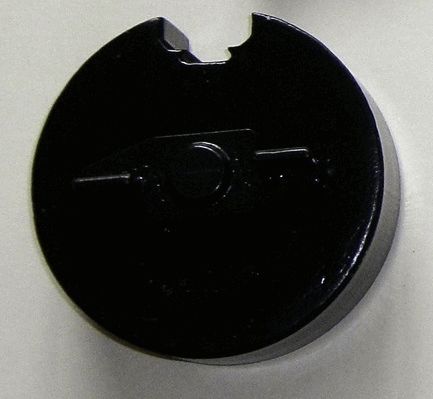
The drum magazine is made of 3 parts and a large bolt and a nut. The nut is embedded into the 3D printed wingnut forming a solid part. Normally I would glue the drum and lid together, but considering that the drum has a large wingnut I decided it was nice to use this as a real wingnut, allowing me to open and close the drum whenever I needed to. Because you never know if I may add something there in the future.But also because the option to open it does make it more realistic, so two birds with one stone.
All parts were printed in ABS and then smoothed by acetone, using the dipping in an acetone bath for a few dips and then shake 'm off and hung to dry in the hot sun for 10 minutes. Then repeated that 2 or 3 times depending on the result of each part.
This process only works when it is a very warm day and when I'm pretty sure that the acetone dries as quick as possible. Because if it doesn't then the acetone will result in leaving white spots behind. I'm not sure how that process works, but it is not the result you are going for.
So during the winter this dipping method is to replaced by the vapor method, not practical for large parts but works like a charm (only perform this vapour method outside and never in the presence of an open flame).
Assembly of the parts
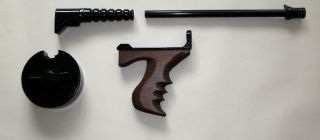
The 3-in-1-gun before the modification and the parts that were added. Most of the parts were 3D printed, except the handle which was made from MDF (stained dark) and the barrel which was just some ordinary PVC pipe (painted black).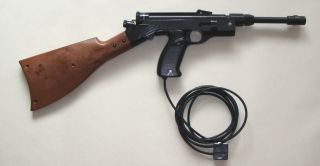
When the short barrel is removed and the new parts are added the lightgun looks a lot more interesting
The case
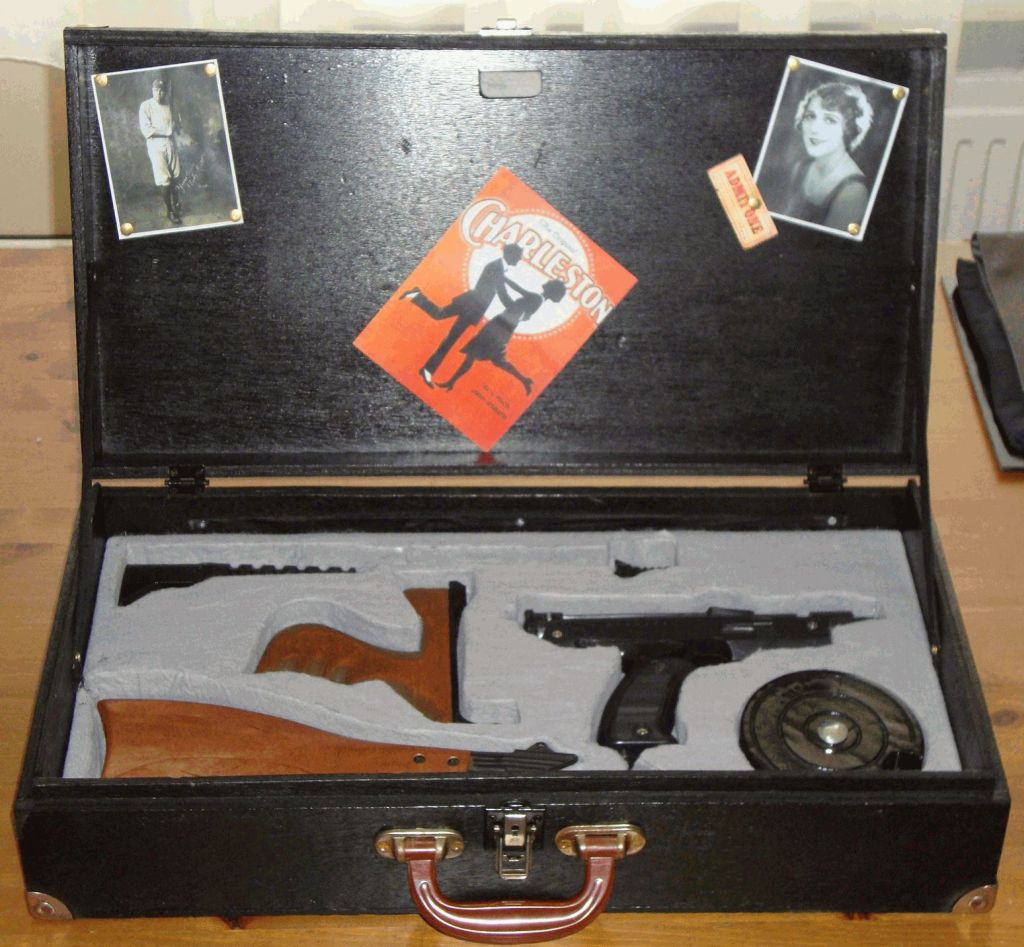
In the movies you might also see that the Tommygun was transported in a custom case, simply to prevent drawing attention when walking around with these. The most iconic cases are perhaps violin cases (or larger instrument cases). Considering I had recently found an old wooden suitcase at my parents home (my father already put it outside by the trash when I dropped by) I thought it was a good idea to use this case for my Tommygun mod. I needed to clean it up, because it was dirty. The wood wasn't in a bad condition but it certainly had seen better days. Also the hinges and locks were rusty, but with patience, glue and a can of black spraypaint I was able to solve it all. Or to be more precise, bring the suitcase to a state where these problems were no longer visible. Considering the case was a little bit on the large side for the thing it needed to do (hold the lightgun), I though it would be nice to use it as a suitcase with a hidden compartment. Well not really hidden as it is very obvious when you open the case, but you catch my drift. Now it looks like a normal case when you open it and then... tada... there's the Tommygun. All in style as it could have looked like in the 20's. Oh... for those who wonder, the bottle of whisky is actually just a small bottle of cooking vinegar, when I was looking for a bottle I noticed in the supermarket this little bottle holding a substance of an acceptable color. This made it very easy for me, all I needed to do was to change the label and I had a nice prope for the case. In the lid of the case you see two photo's, one of Babe Ruth (a very famous baseball player) the other one is of Mary Pickford a very famous actress of the same period. I placed a cinema ticket next to it as a clue for those who might not recognize her immediatley. Also some sheet music of a charleston-like tune. Some socks, a shirt (notice the striped pattern that was so fashonable at that time) clothes, handkerchiefs, a deck of cards and a (plastic) rose.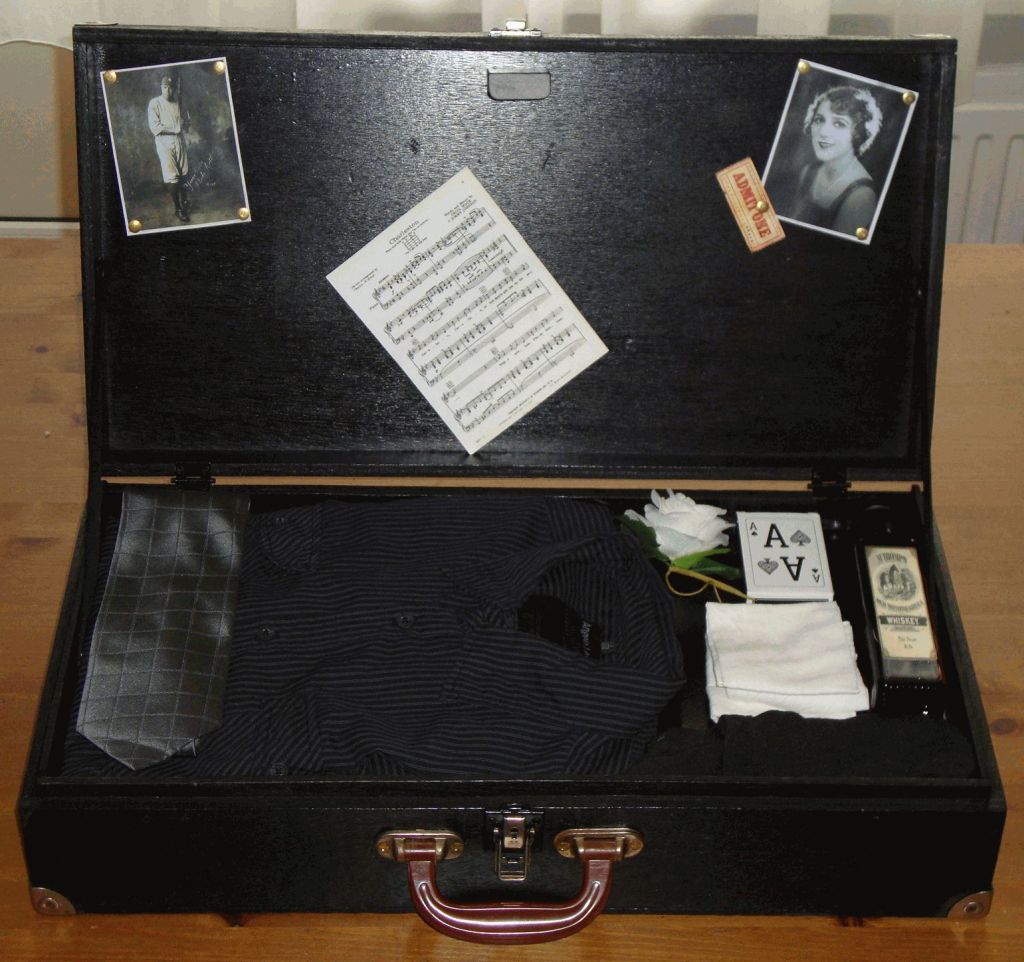
When the "secret compartment" is revealed the lightgun becomes visible
All it needs now is a proper 20's Tommygun worthy lightgun game. Some C64 games even show the gun on the box of the game, for instance "the untouchables" unfortunately that game isn't a lightgun game.
The only game that is appropriate at this moment is the game "Mike gunner", unfortunately it isn't a really fun game.
Below a video of the gun and the case.
General lightgun info
For those who are interested in some general technical details about lightguns on the C64 <click here>Download section
For the schematic (PCB files not available) download the .PDF: 3-IN-1-GUN_SCHEMATIC.pdfRegarding all other info, like the 3D printed parts, download the .ZIP file and go to the folder "Stack_light_rifle": C64_lightgun_games_and_info.zip