setup and workflow for writing a
GEOS auto-exec file
Why this page?
This page mainly concentrates on the development environment required to write a GEOS auto-exec. A modern developer doesn't write his/her code on a C64 any more, sure he/she could but it would not speed up the process. Personally I use a Windows OS on my computer and that leaves me much more room to write my programs. But when I wanted to write an auto-exec for GEOS I ran into a brick wall. Mostly because of my own ignorance, I just didn't know where to start. Using google I found some examples but for many reasons I wasn't able to compile these. It took my quite a time to figure out the correct workflow, to setup my environment with the required tools and to configure/convince Windows in using it.When I look back on things, it wasn't difficult at all. But as always, once you know where to look most things are very easy to find...
Anyway, I'm no expert when it comes to GEOS, everything I know is on this page, it's not much but it might be of help to you if you also want to write an auto-exec program for GEOS.
What is GEOS?
Well, in short it's just a GUI based OS for the C64 and C128, capable of running on an unexpanded C64/128 in combination with a disk drive.Though to make it more workable, more the one drive is suggested and a RAM expansion doesn't hurt either, but still a very impressive OS considering it's running on a 64K system.
For more information please visit: https://en.wikipedia.org/wiki/GEOS_(8-bit_operating_system)
What is an auto-exec?
An auto-exec is a program for GEOS that starts automatically when GEOS is loaded (that program does need to be on the GEOS boot disk). The auto starting qualities make this kind of file perfect for loading drivers or small configurations into the system. And in my case perfect for retrieving the time from the Cassiopei and putting it into the clock related registers of the C64/128, so when GEOS is operational the clock does not need to be adjusted.What do you need?
- a framework on which you can build your code, fortunately I could base my code on "IDE64RTC" (Maciej 'YTM/Elysium' Witkowiak <ytm@elysium.pl>), unfortunately that code required some small modification in order to assemble correctly, but it was the key to my hole project, so thank you Maciej for sharing your code! It was very helpful and I could not have succeeded without it. In the same way I release my code hoping it may be of use to somebody some day.- an assembler, the one I used is "ACME v0.96.2"
- "make-3.81", this is a tool that can save you a lot of typing everytime you want to assemble your project
You can download these files and tools as one single .zip file: tools_and_example.zip
Now you may want to also have the tool called "dirmaster" this is a very useful tool as it allows you to very easily convert the .CVT file into a .D64, because D64 files are much easier to handle.
For instance for quick testing in the emulator VICE. If you'd like you could use many other tools to do the conversion, for instance "star commander", although I never used it myself, I've read it could be done.
Setting up the environment
Having all these files is only the beginning, you need to store them onto your computer (installing) and them you need to configure your computer to properly use it.Start the make-3.81.exe by double clicking it's icon and await for the installer to finish.
Then you need to configure windows by settings a path variable to the location of make, this way does your CMD (or DOS-box) know how and where to find "make".
Below are some screenshots of my windows setup, which is (unfortunately for this article) in dutch, though I'm sure it can be of help to most of you as the screen itself doesn't really change because of the language
As I was told, it should be possible to skip the part of the path variable setup by putting the paths into your makefile, however, for me this was a little too late, but also because I lack the proper makefile writer skills.
So below are some screenshots in changing the path variable.
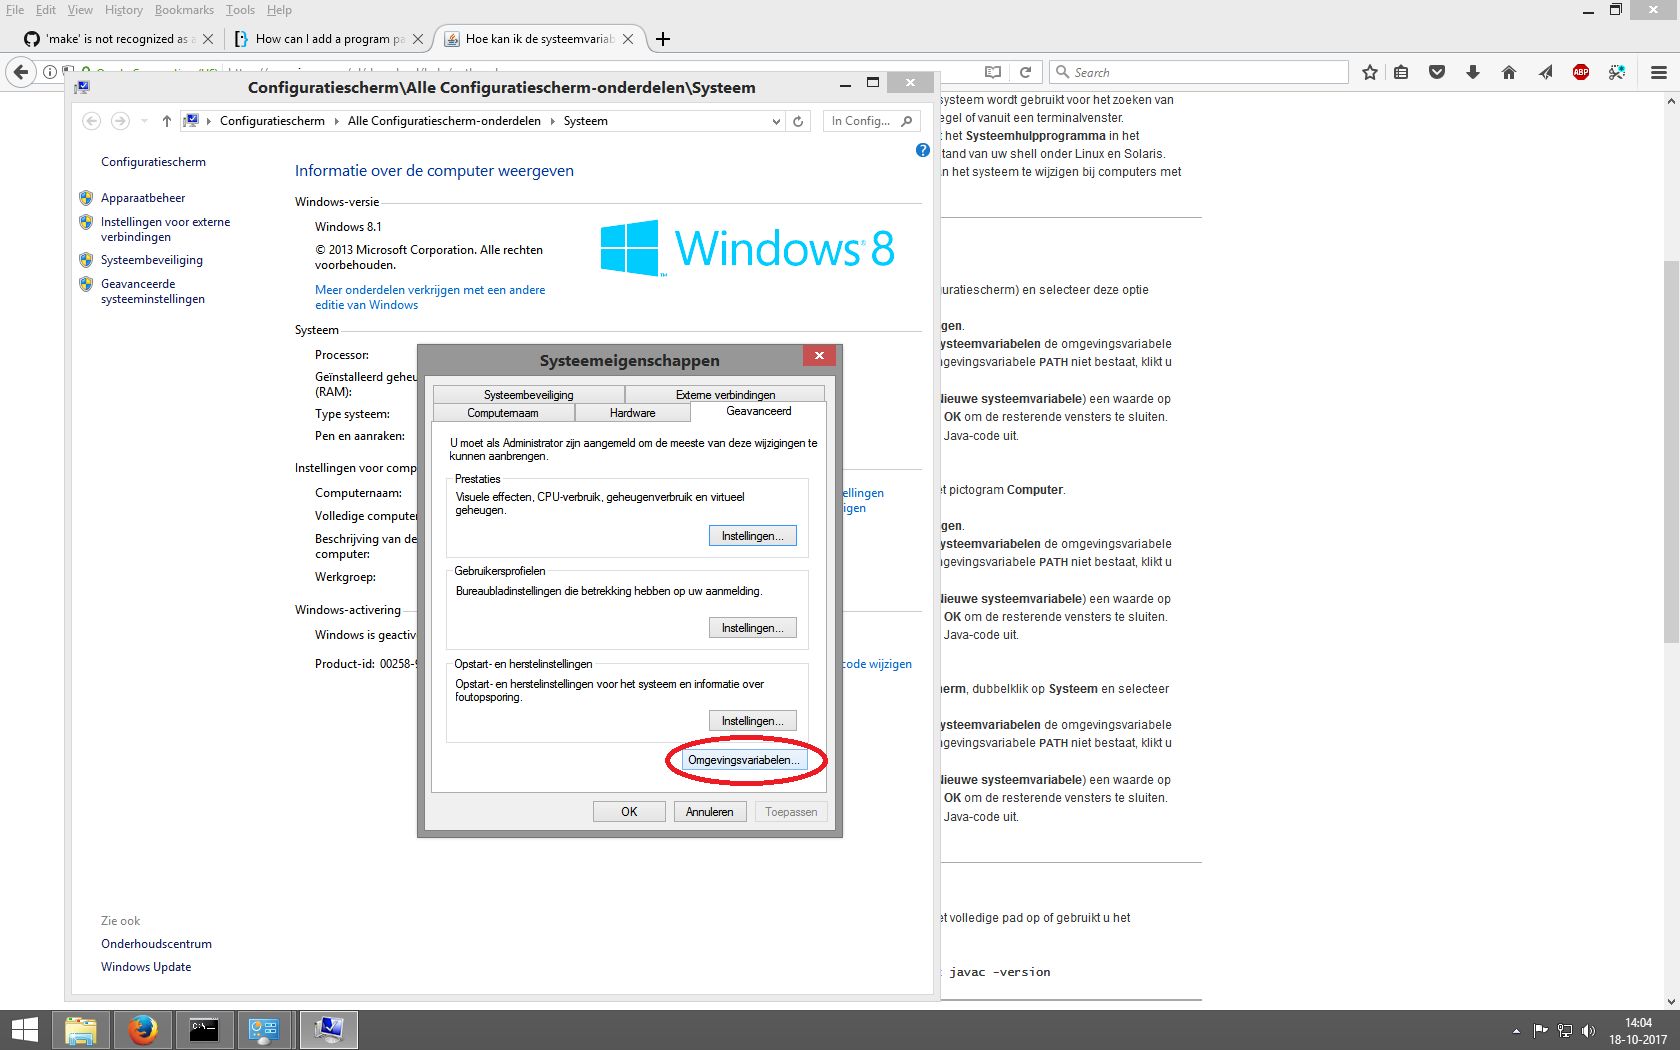

If Path does not exist, then add it. Otherwise just modify the existing entry by adding the new path(s) but BE SURE to include a semicolon at the end of the previous as that is the delimiter for example: c:\path;c:\path2
In my case my path variable settings has changed (after adding the paths for "ACME" and "make") into the following:
C:\Program Files (x86)\Microchip\mplabc18\v3.40\bin;D:\Retro\_Tools\Programming\Assembly\ACME_cross_assembler\v0.96.2\acme;C:\Program Files (x86)\GnuWin32\bin
Assembling the code
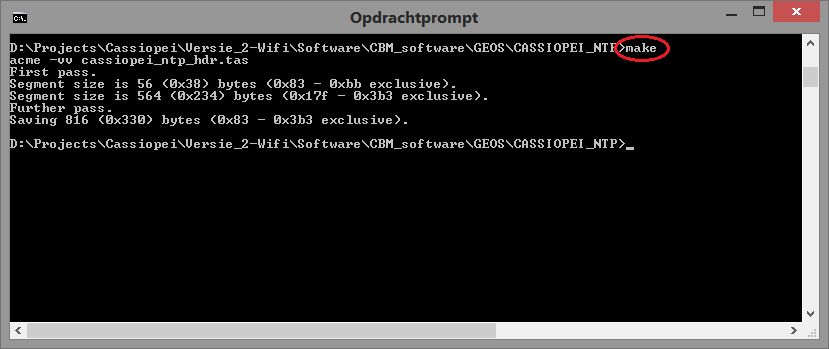
Now that the system is all setup you can use any regular text editor to modify the .tas file(s) into your own project.When you are done and ready for your first compiler action, you can start a CMD (or DOS-box) and type: make
What this does is starting of the "make" tool, which searches for the makefile in your current directory.
For my CASSIOPEI_NTP project I used a makefile (which is a textfile called "Makefile") which has the following contents:
all: cassiopei_ntp.tas cassiopei_ntp_hdr.tas
acme -vv cassiopei_ntp_hdr.tas
Below a screen shot of what happens after starting the makefile with the tool "make"...
The .CVT file can be easily converted by opening it with Dirmaster and saving it as .D64 file.
Using the assembled code with VICE
Okay, now we have a .D64 file with the auto-exec and we have a .D64 with a copy of GEOS 2.0.First start VICE and start GEOS by attaching the .D64 image to device #8 and loading it using: LOAD"*",8,1 and wait a minute...
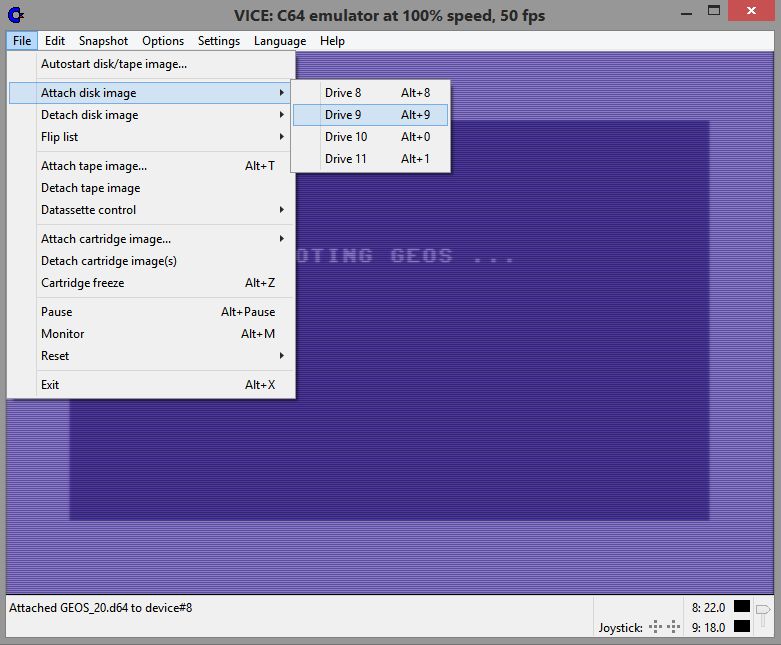
Then attach the .D64 with the auto-exec to device #9, this saves us the trouble of swapping discs in VICE. Soon GEOS will notice the disc and will show its icon.
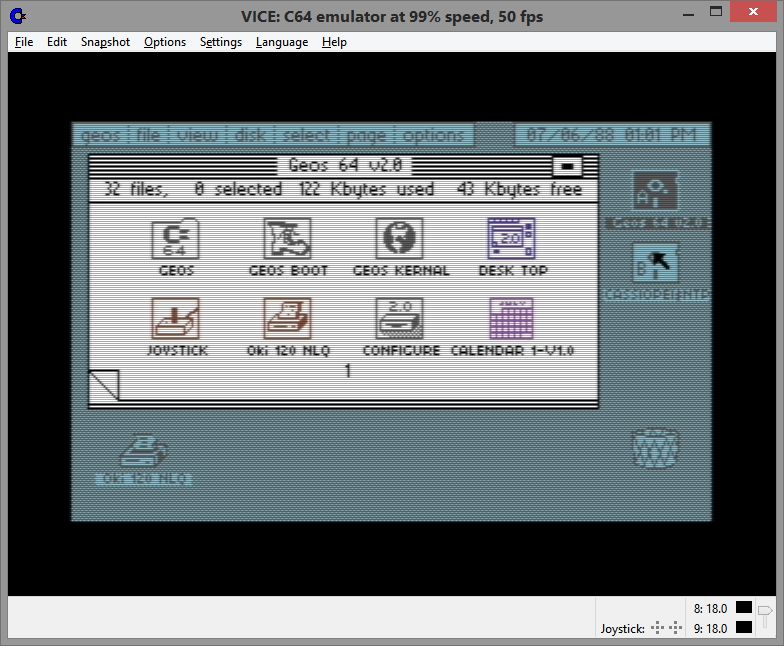
Move the pointer over the icon and open the disc, now GEOS will ask you if this disc needs to be converted. select: YES
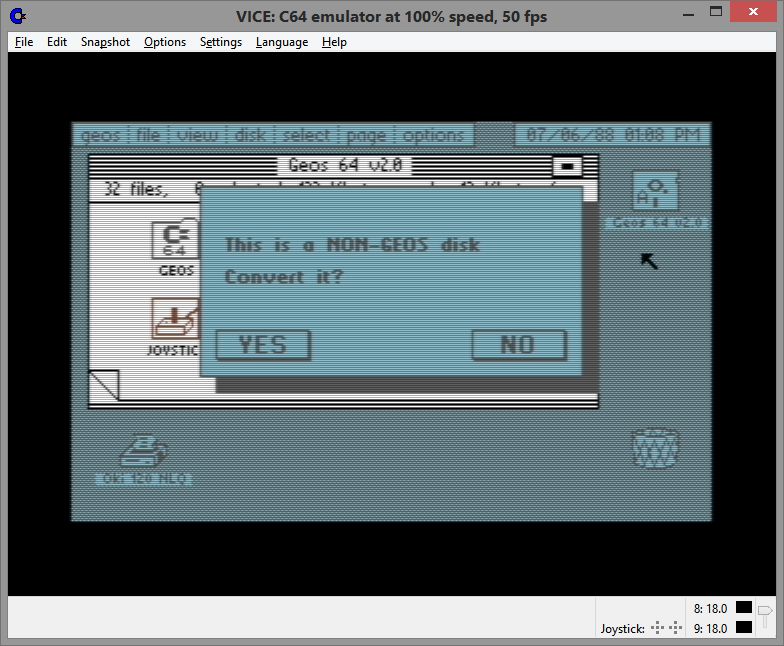
Shortly after that you will be showsn the contents of that disk, there will be your auto-exec with the shiny logo you designed in your text editor (using patience "#" and "." characters)
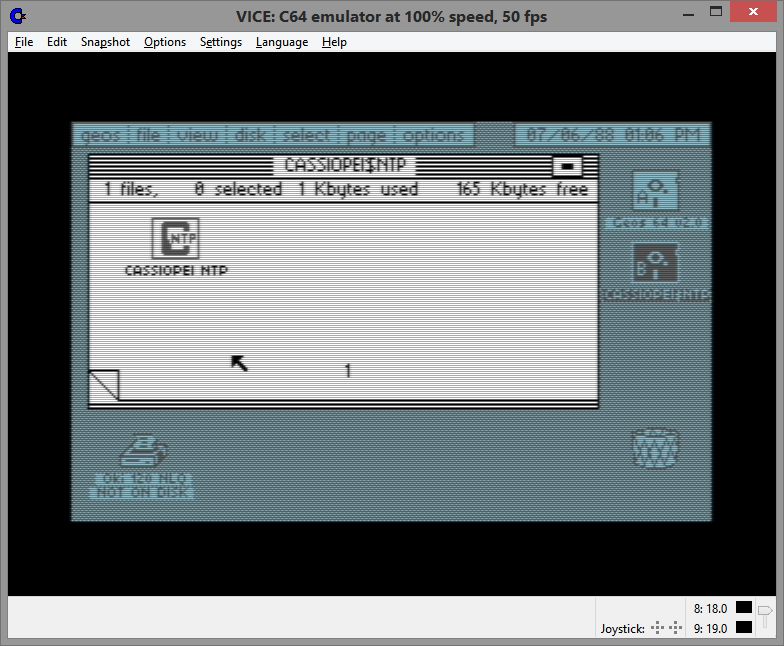
Now all you need to do is start the CASSIOPEI NTP application by double clicking on it.
In order to automatically start this auto-exec, simply copy it to your GEOS disk by dragging it onto your desktop and then opening the GEOS disk and then dragging it from your desktop to your GEOS disk.
Another (more practical way) way could be that you copy it onto your GEOS .D64 disk using Dirmaster. Changing that .D64 file into a real disk prevents you from swapping discs in real life, very practical.
Have fun in making your own auto-exec files.
Important things for an auto-exec
When you've written an auto-exec and user have copied that onto their copy of GEOS then you must be very sure it always works. Because if you wrote a program that attempts to connect to a piece of hardware that doesn't exist well then you could have trouble ahead.For instance, in my auto-exec I made a small check to see if there is a Cassiopei connected to the C64/128, because if it wasn't then it would be endlessly waiting for it, preventing the user from continuing with GEOS. And therefore also preventing the user from removing the auto-exec from his GEOS disk, meaning that everytime GEOS is booted the problem would occur. So in other words, if you write an auto-exec that could hang, you end up in having a useless GEOS disk once that auto-exec is installed/copied onto that disk. Therefore make absolutely sure that your auto-exec cannot fail and if it does make sure it fails safely, granting the user acces to GEOS once your program ends.