A kind man behind a desk filled with radio equipment, demonstrated briefly how the code itself worked and gave us a little piece of paper describing the Morse code alphabet. And also a few pieces of paper with a Morse code message, with the instructions to decode these messages on the ride home. Well the messages got decoded, not in the car but at home. The kids had so much fun with it, that I decided to build a little Morse code trainer for them to play with. The idea behind it was to visualize the dots and dashes and nothing more. Because the wondered why the code consisted of dots and dashes.
Normally I would take out the microcontrollers and build a device that would do far much more then required, costing me days or weeks of tinkering. And because I'm always a little bit annoyed by the complexity of some projects on the internet that seemingly are impossible to build an Arduino while the only thing the project seems to do is drive an LED and a speaker. No this project is low tech, no microcontrollers only a simple regulator and a 555 timer circuit. I also added a little time constraint to prevent me from making this project bigger then it should be, a project for a day, no longer.
A small video to demonstrate the device, the simplicity, the noises and lights make it fun for children to use.
A simple build:
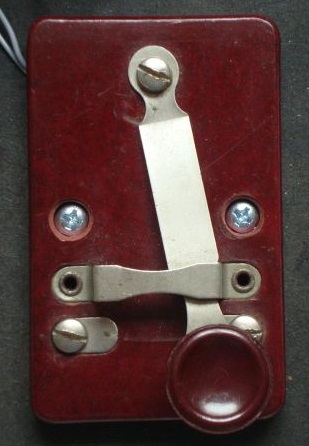
The key I had already lying in a box of memories from the past. I played with it when I was a kid (and it wasn't new when I got it from my dad), so I decided that this little old key should be used. It was designed to play with so it shouldn't be in a box, it should be played with and that is exactly what will happen with it when this project is done. The beeper uses a simple 555-circuit to generate the beep, simply because I didn't have a beeper available that sounded the way I liked. The output is connected to a speaker via a 10uF capacitor, the resistors are 4.7K, the capacitor is 100nF, this gives approx a 1KHz tone.
 For the real Morse-code experience, I figured that the dots and dashes
should be visible (that was the reason I started this little project).
But I did not want to waste rolls of paper. and honestly using paper
would result in all sorts of problems. If it doesn't runs out, it will
get stuck and the pencil that does the writing will make it
complicated if it has to be child proof. Not that my kids brake
anything, I simply want it to last forever. Not using paper then what
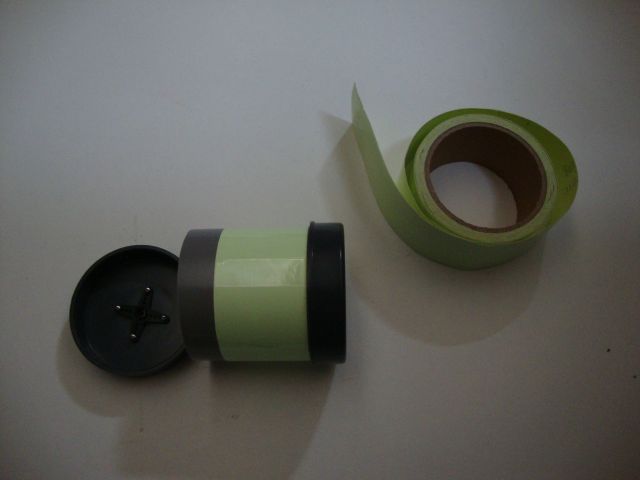
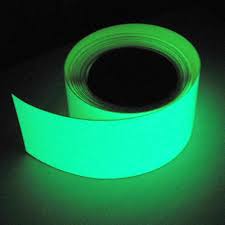
else can I use, an electronic display, no! But I remembered I had some
unused glow-in-the-dark tape from a different project. When stuck onto
a rotating cylinder, it would simulate an endless screen. The pen that
writes would simply be a beam of light from a white LED (now
technically UV is much better for lighting phosphorescent surfaces,
but I did not have a UV LED and I did not like the idea of exposed UV
in toys). With the help of 80 mm PVC pipe and two end caps. I drilled a
hole exactly in the middle of the end-caps. One end-cap is used for
the connection the the servo motor, the other is used to mount a small
ball bearing for stability. The end-caps are drilled very precisely to
prevent wobbling, this was in fact the most important part of the
entire project.
For the real Morse-code experience, I figured that the dots and dashes
should be visible (that was the reason I started this little project).
But I did not want to waste rolls of paper. and honestly using paper
would result in all sorts of problems. If it doesn't runs out, it will
get stuck and the pencil that does the writing will make it
complicated if it has to be child proof. Not that my kids brake
anything, I simply want it to last forever. Not using paper then what
else can I use, an electronic display, no! But I remembered I had some
unused glow-in-the-dark tape from a different project. When stuck onto
a rotating cylinder, it would simulate an endless screen. The pen that
writes would simply be a beam of light from a white LED (now
technically UV is much better for lighting phosphorescent surfaces,
but I did not have a UV LED and I did not like the idea of exposed UV
in toys). With the help of 80 mm PVC pipe and two end caps. I drilled a
hole exactly in the middle of the end-caps. One end-cap is used for
the connection the the servo motor, the other is used to mount a small
ball bearing for stability. The end-caps are drilled very precisely to
prevent wobbling, this was in fact the most important part of the
entire project.
 To allow the drum to be safe and durable, the system uses a friction coupling to the motor. Now this
sound very complicated, but in fact it isn't. The drum is glued to the
end-cap with the ball bearing but not to the end-cap connected to the
motor. So the friction between the end-cap and the PVC pipe is the
only connection between the motor and the drum. Why, well, easy access
during assembly and if there is any wobbling it will not result in
forces on the motor. But most importantly, if somebody decides to stop
the drum by hand or move the drum while the system is powered of then
the drum can turn freely without damaged to the motor/gears or the
child who stick its finger or hand in the wrong place... This method
of coupling prevents the motor from being used as a generator, feeding
the circuit accidentally. Which otherwise could result in damage to
the 555 or the voltage regulator if the motor is turned in the wrong
direction. Now the drum is complete, it can be covered with the
glow-in-the-dark tape to create the display for the dots and dashes.
To allow the drum to be safe and durable, the system uses a friction coupling to the motor. Now this
sound very complicated, but in fact it isn't. The drum is glued to the
end-cap with the ball bearing but not to the end-cap connected to the
motor. So the friction between the end-cap and the PVC pipe is the
only connection between the motor and the drum. Why, well, easy access
during assembly and if there is any wobbling it will not result in
forces on the motor. But most importantly, if somebody decides to stop
the drum by hand or move the drum while the system is powered of then
the drum can turn freely without damaged to the motor/gears or the
child who stick its finger or hand in the wrong place... This method
of coupling prevents the motor from being used as a generator, feeding
the circuit accidentally. Which otherwise could result in damage to
the 555 or the voltage regulator if the motor is turned in the wrong
direction. Now the drum is complete, it can be covered with the
glow-in-the-dark tape to create the display for the dots and dashes.
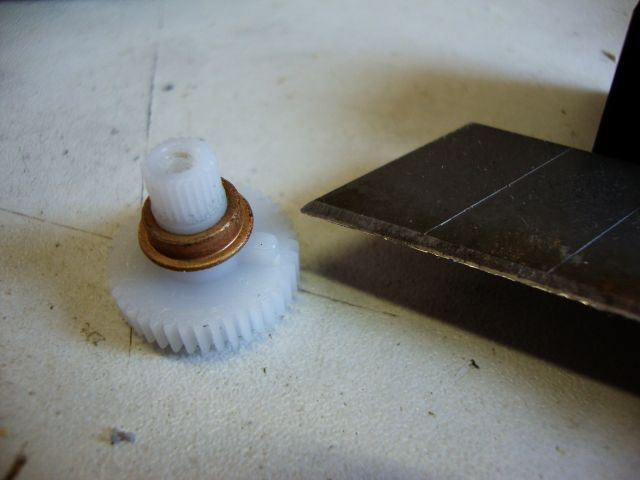
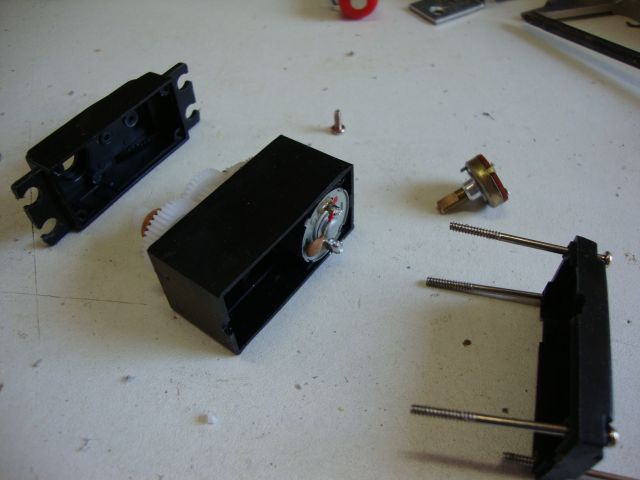
To drive the drum just a small and slow
motor is required, a servo motor, without the electronics, is
perfectly suited for the job. But in order to use a servo, the
end-stop must be removed. Also the electronics are removed as the
motor is always on. To slow down the speed of the drum , the servo
motor is driven by 2.5V from a LM317 regulator, because otherwise when
directly connected to 5 volt, it would simply rotate too fast. The
power supply, well, in 2014 every modern device seems to have a USB
connector and a wall wart to go with it. So instead of searching for a
spare power supply I decided to use such a USB power supply. Now a
little spray of black paint to hide the color of MDF to make it more
appealing and I'm done.
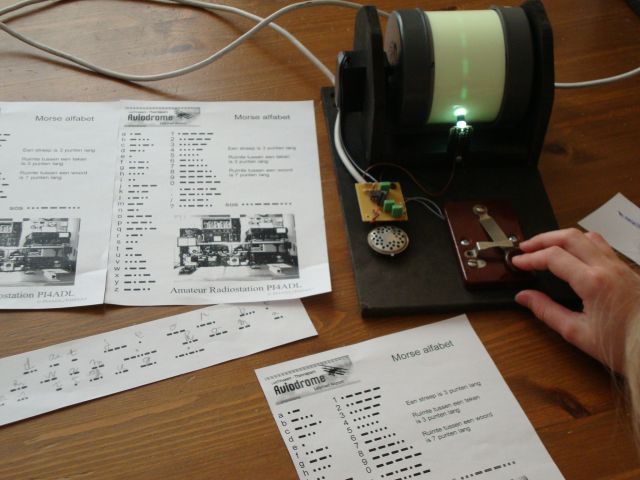
The end result is shown below.Here you see the paper containing the Morse-code alphabet and the "mysterious message" the kids decoded. I was surprised how quickly they did this and the joy it gave them. The device below visualizes the dots and dashes of the sounds making it easier to see what they've done and creating the illusion of the transmitted message.